
Step 1: Choose the destination
- Go to WP Taxonomy → Data Manager, select Categories, tags & terms, and click Import.
- In the Destination category, tag or taxonomy, choose where the new terms will be created. For post categories, choose Categories (category).
- Click Continue to upload.

Figure 7. Choosing the destination taxonomy.
Note: Every row in the file goes into the taxonomy you choose here. A file of categories imported into Tags creates tags.
Step 2: Upload the file and map its columns
- Leave File format set to CSV (.csv or .txt). Excel and JSON files need Pro.
- Drag the file onto the upload area, or click Choose a CSV file and select it.
- Check Map CSV columns. Each column of your file is matched to a term field automatically. Change a dropdown if a match is wrong, and choose Ignore this column for columns you do not need.
- When the badge shows Mapping ready, click Confirm import.
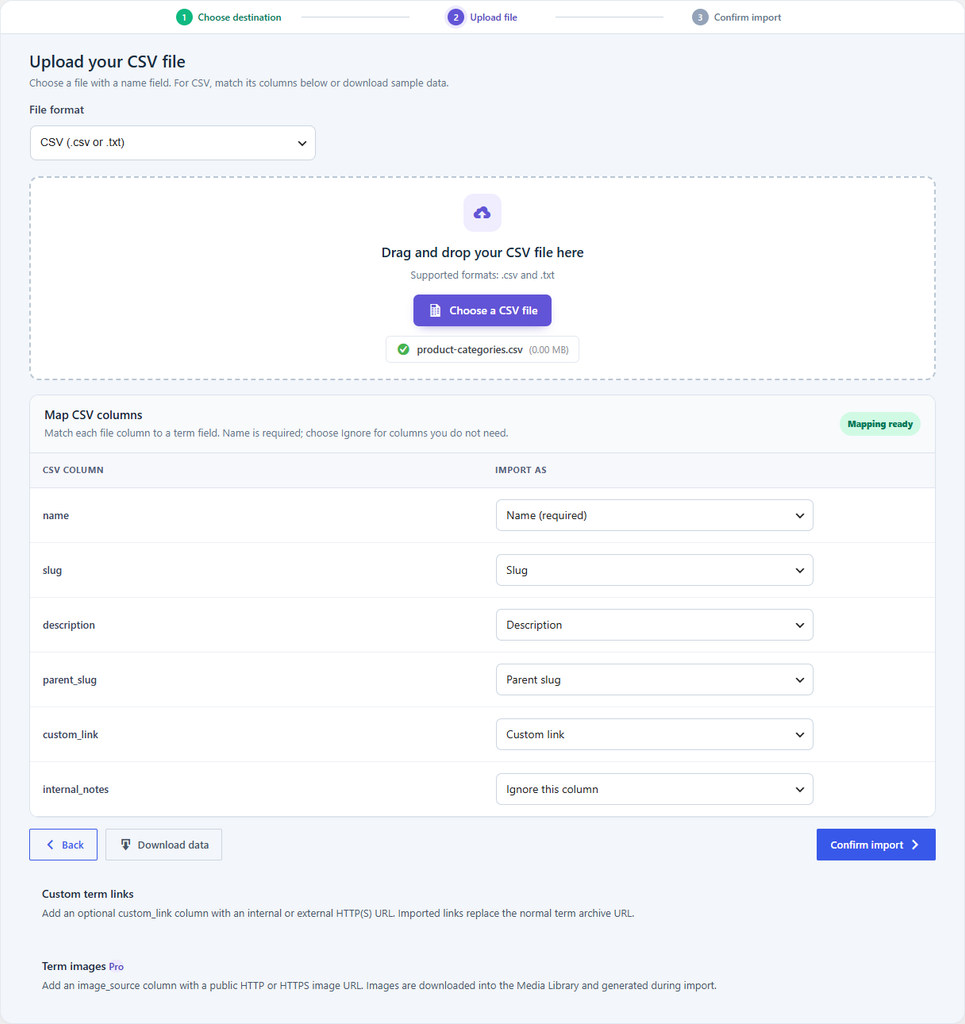
Figure 8. The uploaded file with its columns mapped. The internal_notes column is ignored.
Each term field can be used once, and one column must be mapped to Name or Term path. Download data gives you a sample CSV file to fill in; it does not contain your site’s terms.
Step 3: Confirm and import
- Check the destination taxonomy and the file name.
- Click Import CSV.
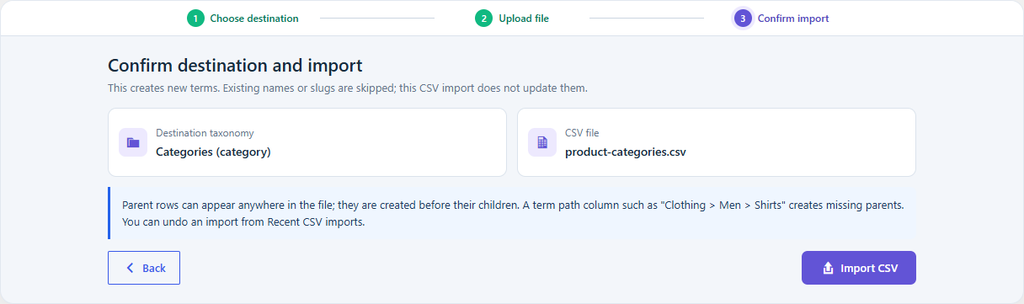
Figure 9. The confirmation step.
Review the results
When the import finishes, the page lists Imported Terms and Skipped Terms. A row is skipped when the taxonomy already has a term with the same slug, or with the same name under the same parent. This importer never changes existing terms. To update existing terms, use Advanced CSV Import (Pro).
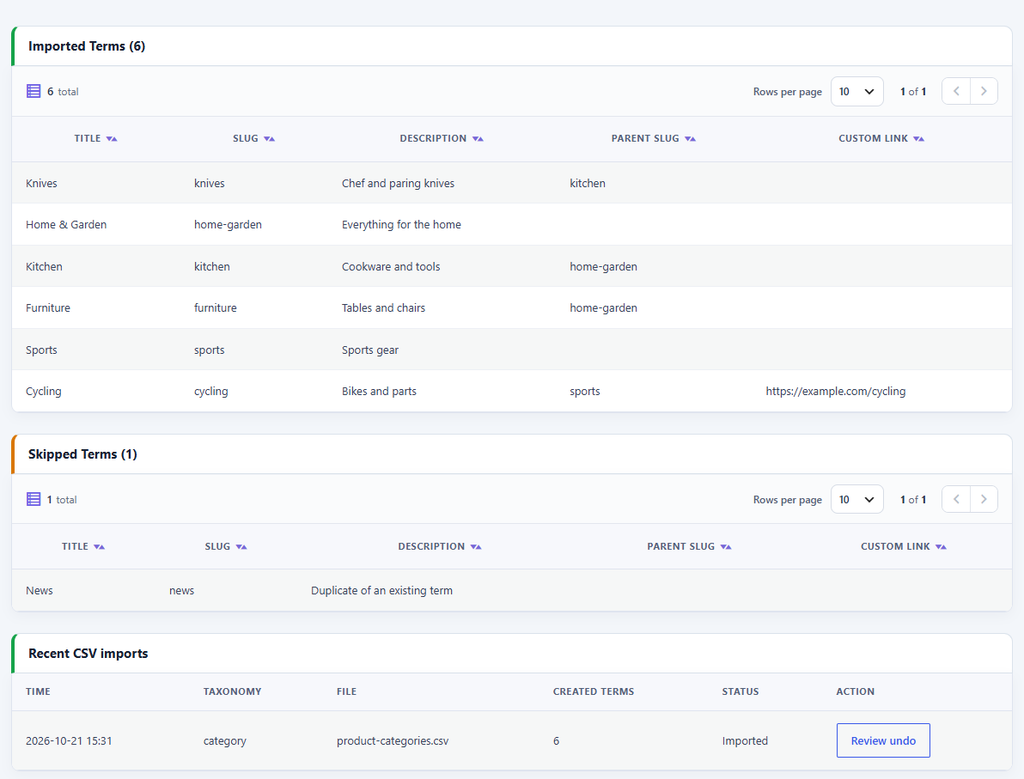
Figure 10. Six terms were created. The News row was skipped because a News category already exists.