
Advanced Import tests your file with a dry run before anything changes, and it can also update existing terms.
Step 1: Choose the taxonomy
- Go to WP Taxonomy → Data Manager → Advanced Import.
- Click the card of the target taxonomy.
- Click Continue to CSV upload.
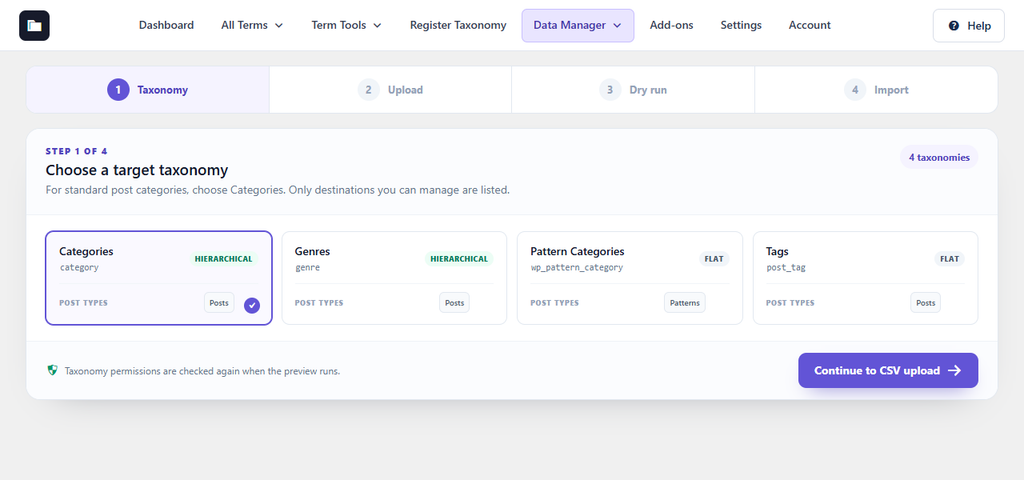
Figure 27. Choosing the target taxonomy.
Step 2: Upload and map the file
The import mode decides what happens to each row:
- Create and update: creates missing terms and updates matching ones.
- Create new only: skips every term that already exists.
- Update existing only: skips rows that do not match an existing term.
- Select the import mode.
- Under Fields to update on existing terms, untick the fields that must not change.
- Click Choose File and select your CSV file. By default, files can have up to 5 MB and 5,000 rows; you can change these limits in Settings.
- Check Map CSV columns. To reuse this mapping later, type a name in Save current mapping as and click Save mapping. Saved mappings are listed in Saved mapping.
- Click Run dry import preview.
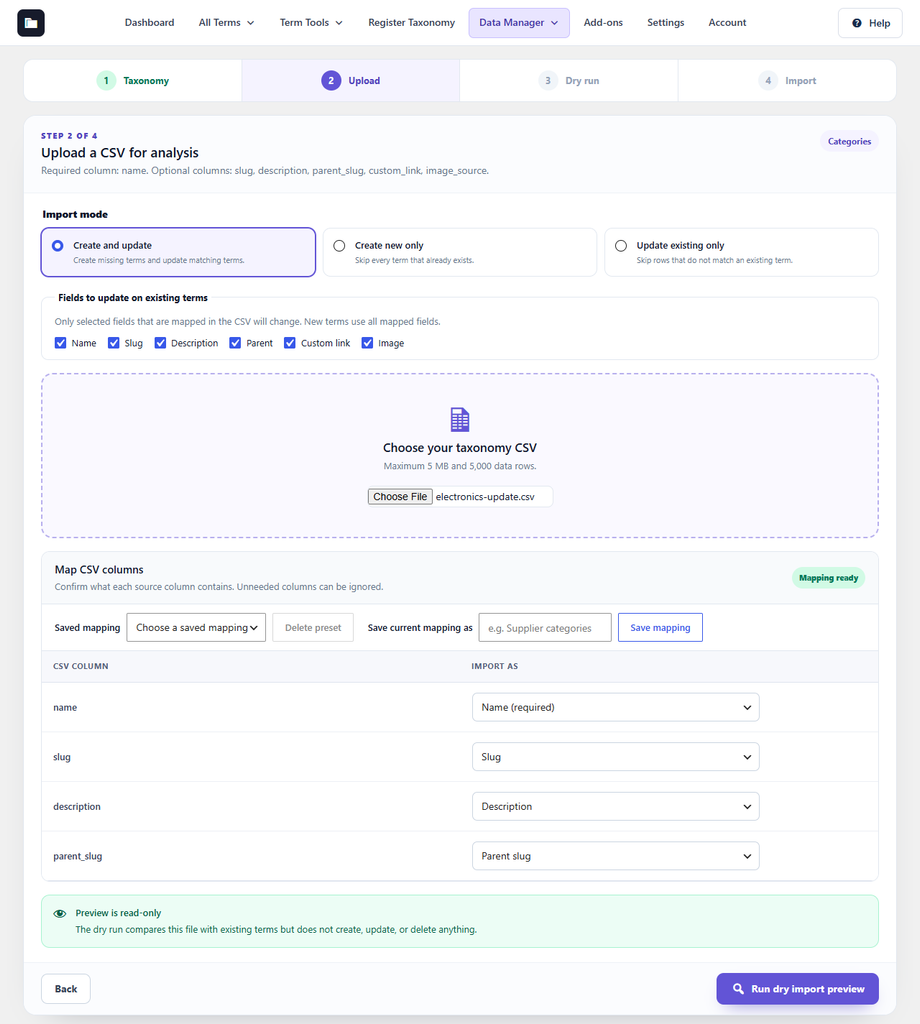
Figure 28. Import mode, fields to update, and column mapping.
Step 3: Review the dry run
The dry run shows what the import would do to every row: Create, Update, Skip, or Error, with the reason. Nothing has changed yet.
- Read the totals and the row details.
- If there are errors, click Download error report (CSV), fix the rows, and click Change CSV to upload the corrected file.
- When you are ready, click Import N ready rows.
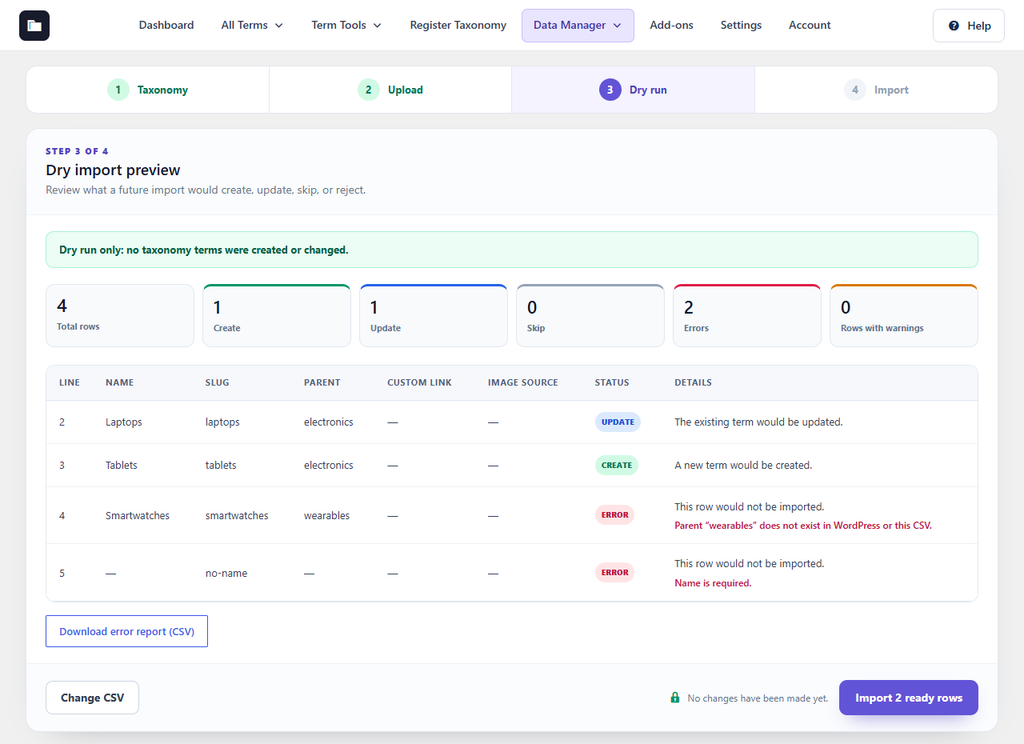
Figure 29. The dry run found one update, one new term, and two errors: a missing parent and an empty name.
Step 4: Import
The import runs in the background in small batches, so you can leave the page and come back to check progress. If a job pauses or stops, open the page again to resume it.
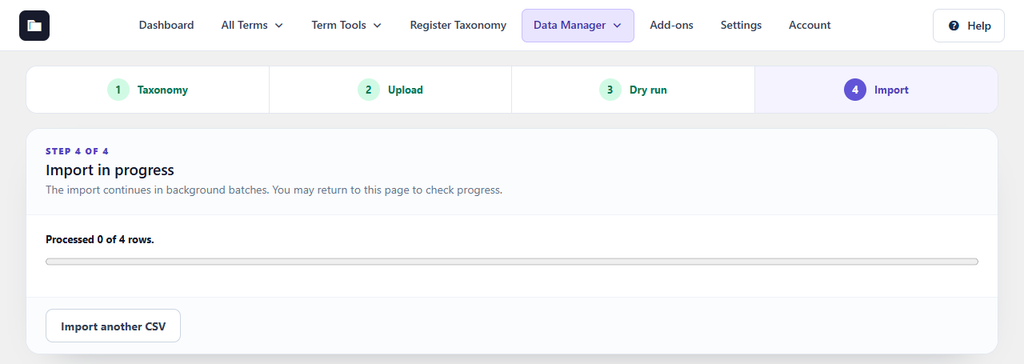
Figure 30. The import running in the background.